


Google launches the new Google Tag
Written by:
 Finn Ruijter
This summer, Google introduced a tool that takes ease of use to a whole new level. We can’t emphasize enough how important accurate measurements are for your website—but for this, you need tags. Yes, tags, but not anymore. The plural form can now be replaced with the singular, as Google has launched the new Google Tag (formerly gtag.js).
A handful of users may still rely on Universal Analytics, but most of you are likely using tags like Google Analytics 4 and Google Ads to consolidate measurements on your website. All these tags previously had to be manually configured via Google Tag Manager. Surely, there must be an easier way, thought Google.
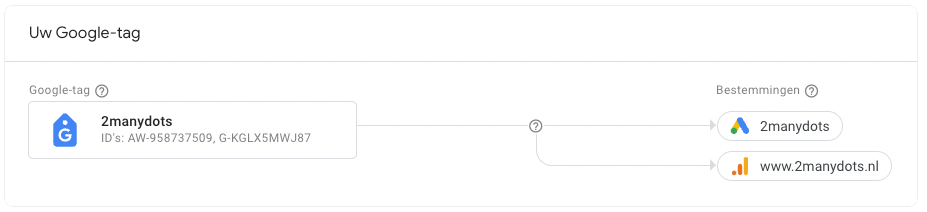
This idea stuck with them, and they came up with a fitting solution. With the Google Tag, the brilliant minds in Silicon Valley have developed a way to implement a single tag for your entire website while linking it to multiple destinations. This means you no longer need to manage multiple tags for different destinations.
Google’s new tool already offers several benefits, and these will only continue to grow in the future. Below are some of the current advantages highlighted:
The only downside is that currently, only Google Ads and Google Analytics accounts are supported as destinations. However, there are plans to expand this in the future to include tools like Optimize, Surveys, or possibly external services.
Currently, each platform (Ads or Analytics) has its own Google Tag (gtag.js). This serves as a framework to ensure those platforms function properly. At that time, the Google Tag didn’t add much value for you as a user. Besides being potentially confusing, there was also a higher risk that the different tags didn’t share the same settings.
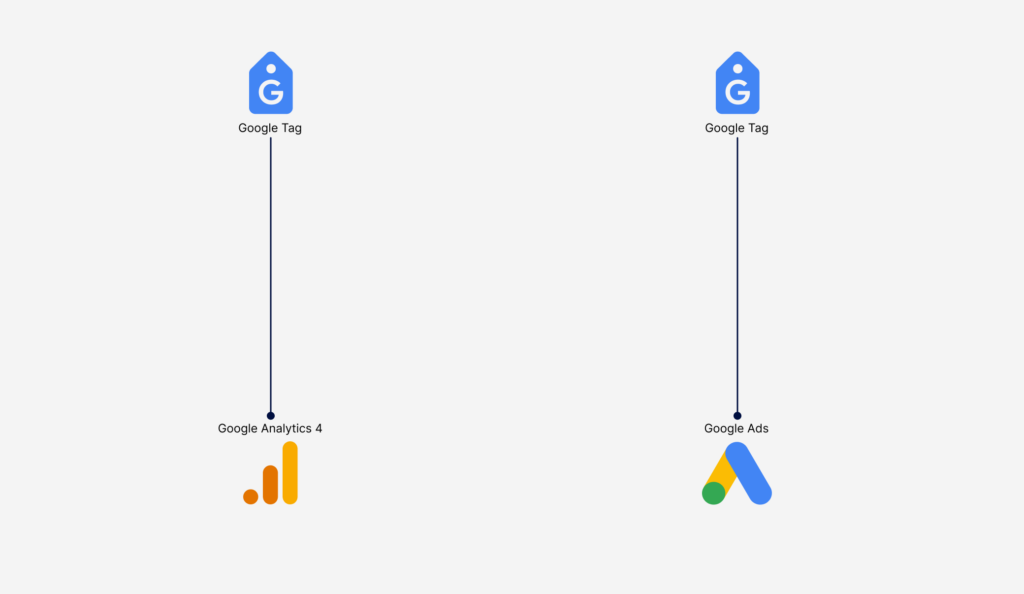
In the new setup, Google gives you the option to combine these Google Tags (gtag.js). This allows you to measure everything through a single tag while automatically sending data to multiple platforms. If you ever need to make changes, such as excluding certain IP addresses or specifying which domains the Google Tag is allowed to track, all combined platforms will automatically account for these adjustments. This saves time and reduces the risk of errors.

There’s a good chance you’ve already completed this step since it’s essentially the same as setting up the Google Analytics tag. However, we’ll go through it anyway.
Setting up the Google Tag can feel a bit confusing. You can configure it through Google Tag Manager, Google Analytics, or Google Ads. We’ll focus on Google Analytics, as this is the most familiar tool for most marketers. Make sure the account you’re using has Admin permissions for all the platforms you want to link to the Google Tag.
If you’re only using Google Analytics, you can skip the next step. Now, let’s focus on adding Google Ads.
You can repeat this process to add all your destinations to the Google Tag.
Do you suspect that not all pages are being tracked properly? The Google Tag can help with this. The new tool provides a clear overview of which pages are being tracked and which might be missing. Every time someone visits your website, the Google Tag is loaded. It works together with Google Analytics, Google Ads, and Google Tag Manager to monitor what is and isn’t functioning correctly.
You can find the tag coverage under Admin > Tag Coverage in Google Analytics and Google Ads.
Keep in mind that Google doesn’t automatically display all pages. You’ll need to add these pages manually. Our advice is to use tools like Screaming Frog or Integrity to export all URLs to a CSV file and import this into the tag coverage tool.
The new Google Tag offers many possibilities, even more than those described above. Stay up to date with all developments surrounding the Google Tag by following Google and 2manydots.
Would you like help setting up the Google Tag? Feel free to contact 2manydots.